Using Salesforce as an Authentication Provider
In this post we will see how Salesforce can be used as an authentication ( + authorisation) provider with OpenID connect.
But first, what exactly is OpenID connect anyway? In simple words - it is a way to perform authentication and (basic) authorisation from a trusted server using OAuth 2.0 protocol.
This is a high-level flow to implement Salesforce authentication -
- Create login function: create a “Login with Salesforce” button in your external application. On click, request Salesforce to authenticate and provide basic details of user
- Create connected app
- On authentication, Salesforce checks correct id/ password. If the calling application is valid and user has valid “client id” and “secret key”, Salesforce provides a JWT for the user
- Use the JWT and invoke yet another API to get the user profile information
1. Login Function #
We could create and debug the entire flow after creating an external app that can invoke Salesforce APIs, but I am too lazy for that. Instead, we will take the “lazy developer approach”. Use the Heroku app at https://openidconnect.herokuapp.com/ for some quick testing of authentication using OpenID Connect on Salesforce.
2. Create Connected App #
Go to Setup > Platform Tools > Apps > App Manager. Click New Connected App button.
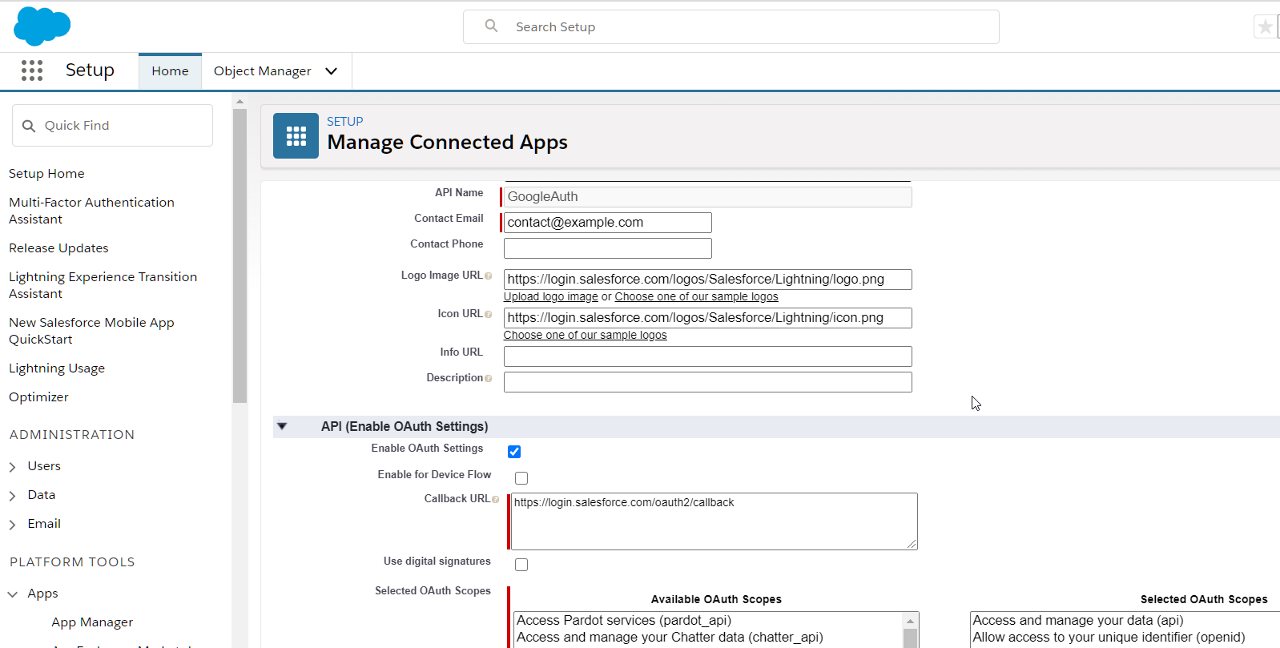
- Provide name -
GoogleAuth, and contact details - Use a logo and icon
- Provide
Callback URLashttps://login.salesforce.com/oauth2/callbackandhttp://openidconnect.herokuapp.com/ - Provide
Selected OAuth Scopes.Allow Access to Unique Identifer (openid)is important, rest is up to you - Check
Configure ID Tokenand provideID Token Audiencesashttps://login.salesforce.com(if you are doing this on a sandbox / custom URL, use the specific URL) - Check
Include Standard Claims
Test your Authentication #
“View” your connected app in Salesforce to get Consumer Key and Consumer Secret. Paste them in the OpenID Heroku app window.
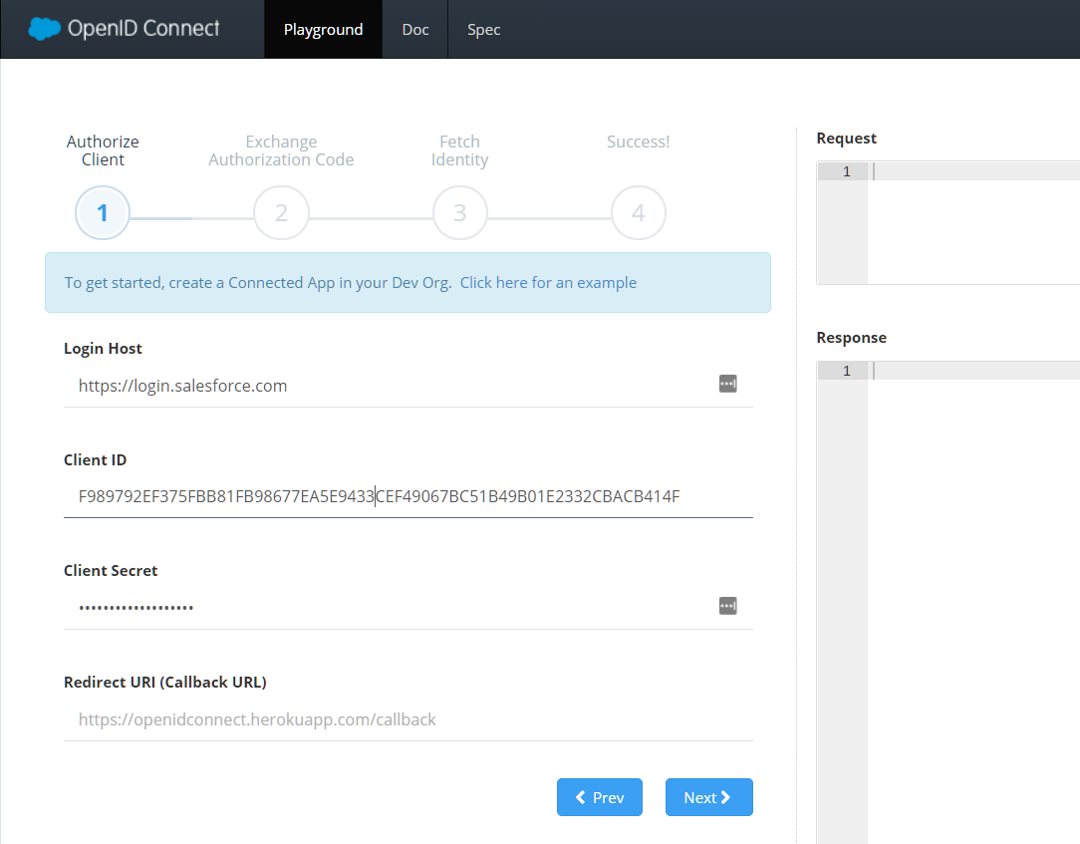
- Hit
Nextin the test app to authorize the client withClient IdandClient Secret - An
Authorized Codeis returned from previous step upon successful authentication. - Hit
Nextagain to use the authorized code to establish trusted transaction with Salesfore (you “exchange” the authorization code). You will be sending a POST request to/services/oauth2/token. Note that theid_tokenin response is JWT - you can actually see the information in JWT “de-hashed” intoID Tokentext field in the Heroku app - Use the token obtained in previous step to get user info. The app does this by sending a request to
/services/oauth2/userinfowithAuthorizationset toBearer <token> - You will receive a response with user details
Note: Did you receive an error in Step (1) when you click
Next? Just ensure yourCallback URLincludeshttps://openidconnect.herokuapp.com/.
That’s it. You have created and tested the entire authentication flow with Salesforce!