Create Quick Data Entry Screens with Screen Flow
The typical “CRM flows” work ok, but there’s always opportunities to make them efficient.Consider the below simple “new customer onboard” work flow -
- Create account (and contact) information
- Capture a case for an installation service
Normally, this would mean -
- User visits account screen to capture account information
- Click on
Newbutton inCasepopup, or go toCaserelated list and capture case information
While the process does not seem too complicated, imagine what will happen when you need to do this hundreds of times per day, under stress, and in a call with customer?
Of course, you can make the process a bit faster by using a ‘console’ of some kind, but the number of clicks cannot drastically reduce from non-console screens.
So, it goes that we have had instances in the recent and distant past when we simply created separate screens for fast data-entry requirements -
- One-screen data entry - avoid mouse clicks if at all possible
- Quite a few sensible defaults
- Minimise validations and keep them focused
An alternative to building out UI and changing business layer validations in Salesforce is “Screen Flows”. Screen flows provide a quick and efficient way to build out those kind of data entry screens.
Let us create a quick test flow to demonstrate ease of development and the use case of creating an account and case together.
Go to Setup > Process Automation > Flows. Click New Flow button to launch a new flow wizard. Select Screen Flow in the first screen to create a screen flow.
Add a Screen Element to the flow and give it a label - Quick Create Customer. We will create four UI elements here -
New Account Name- a simple text boxCase Type. Select this as a picklist. One of the beautiful features of flow is that you can map the picklist choice to the picklist used inTypefield inCaseobjectPriority. Select this as a priority similar to case type.- Description
Each one of the fields will have API names which store the values provided in screen element and make them “referenceable” elsewhere in the flow.
Next, add a new step by clicking on the + icon. Select Data > Create Records. Select Account as object and Use Separate Resources and Literal Values option so that you can map the account fields to the values provided by user in screen element. In our case we just map the account’s Name to the API name of the account name field in screen flow (e.g. Account_Name).
We add a similar step to create a new Case and map Type, Priority and Description fields.
Your flow will look somewhat like this..
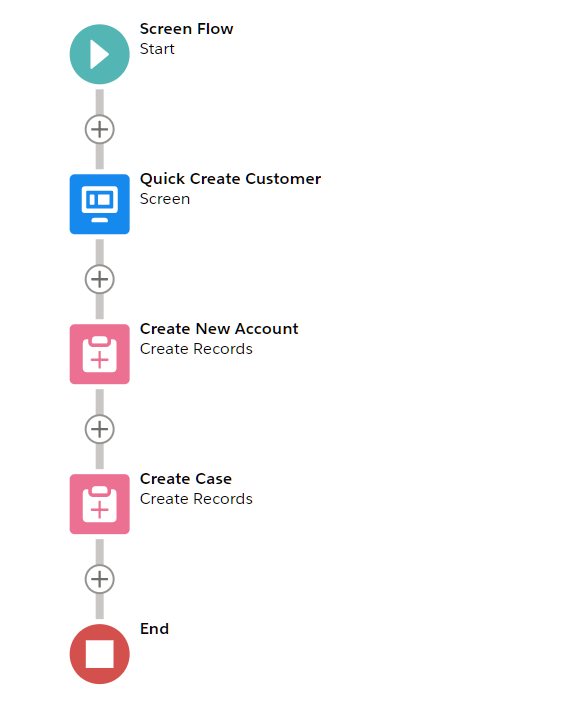
Activate the flow by clicking on Activate button :)
Finally, we have to call this flow from somewhere. For demonstration, let us do that from the Account Detail view.
Add a button to the account layout to invoke the screen flow. Go to Setup > Object Manager tab > Search for Accounts and drilldown on it > Select Buttons, Links, and Actions. Hit New Action to create a new action.

Include the quick action in your layout.
Go to Setup > Object Manager tab > Search for Accounts and drilldown on it > Select Page Layouts > Drill down on the layout where you want to see the action link > Select Page Layouts. Drag & drop the action link in Salesforce Mobile and Lightning Experience Actions section.
Go to the account detail view, click on the Quick Account action link to see a beautiful looking workflow screen.
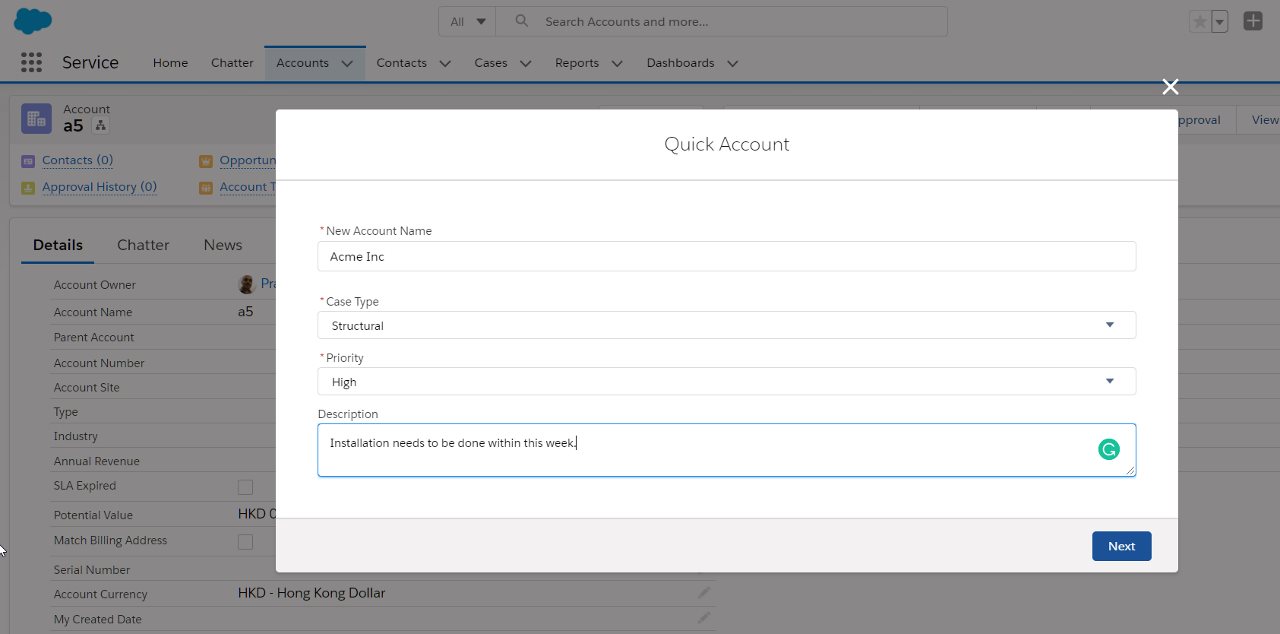
Users can quickly type in four fields without additional clicks to create a new account, a new case and associate case to the account.