Developing in Salesforce.com (2021 Edition)
Salesforce.com development experience has improved leaps and bounds over the past five years, and continues to rapidly innovate and evolve. So, how do you do Salesforce.com development in 2021? Here’s a rundown of trends and the step-by-step guide to get started.
The Two Things to Do in Salesforce Development #
Developing in SFDC used to be a whole lot of clicks, some code and black-box. Not anymore.
Version Control System as Source of Truth #
Salesforce DX enables source-driven development, rapid coding & testing, and a standard developer experience. You no longer refer to a specific Salesforce org as reference, but to a specific branch in your version control system.
With the associated powerful tooling and the new way of working, you get -
- Fully version controlled code
- Easy environment builds - ability to stand up infrastructure from version-controlled base using deployment features and scratch orgs
- Standardized development & deployment methodologies
Rapid Development & Deployment #
No more rapid clicks, fidgeting with different screens (well, bear with me), and difficult copy/paste for developing new functionality.
Instead -
- Get the code base in developer’s local machine
- work on code with any standard IDE/code editors
- enhanced static analysis and linting rules
- develop and test using scratch orgs
- enable continuous integration with standard tools and underlying SFDX tooling
- improved packaging that provides you fine-grained control to distribute your product
- .. and more.
Getting Started with Modern Development in Salesforce #
There is nothing complex here, really. But, the process does change the way you have been doing salesforce.com development.
Setting up #
Open VSCode > Hit Ctrl + Shift + x to view extensions. Search for Salesforce Extension Pack and install the extension.
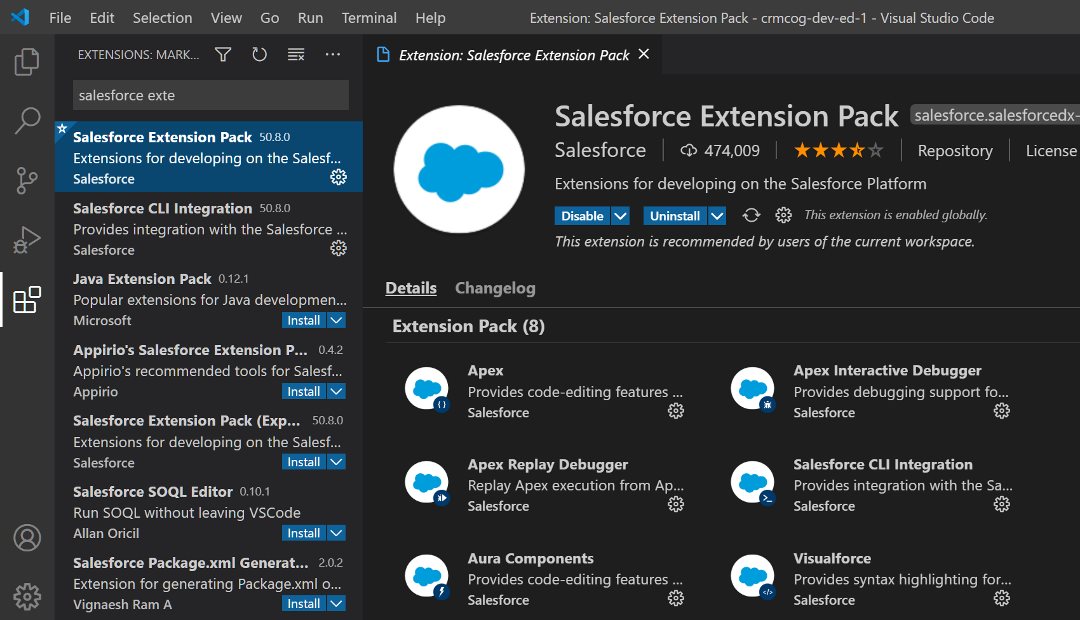
Hit Ctrl + Shift + p to open command pallette in VSCode. Try entering sfdx: create project and you should see auto-completing SFDX commands.
Make sure you have a Salesforce.com developer edition to play around with, or you have access to a developer hub and creating scratch orgs.
In VSCode, hit Ctrl + Shift + p to open command pallette. Enter SFDX: Create Project with Manifest.
Quick tip: You can invoke a command by typing any part of the command. It’s a common practice to start typing
create proj..and select the option from the auto-complete menu.
Provide a name for your project, select Standard Template as the option, and select a folder in which your local files will be stored. VSCode will invoke sfdx to create a skeleton structure in the specified folder.
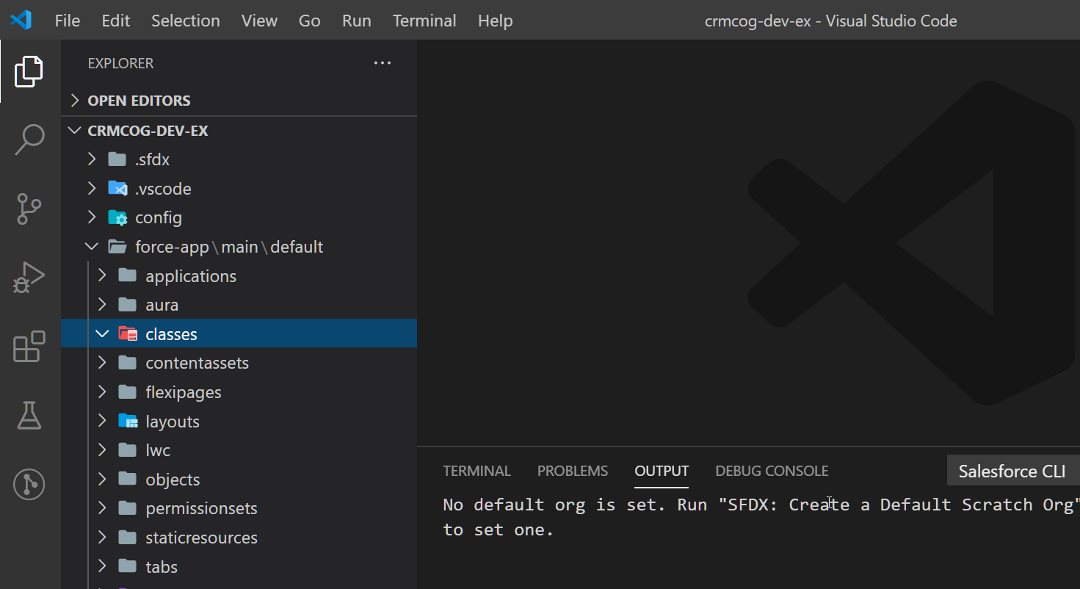
Run either of the below commands depending on the org -
SFDX: Authorize an Orgto select an existing orgSFDX: Authorize a Dev Hubto select an existing dev hubSFDX: Create a Default Scratch Orgto create a scratch org
More details on the above options are in subsequent sections.
You can set the default org for the project as your developer edition, a developer hub, or a scratch org. The local code can be version controlled and connected to a Git repo.
You can even have multiple projects pointing to the same org and confuse the heck out of yourself.
Next up - we see two different ways of working with SFDC code locally.
Working with VSCode + Stand-alone Developer Edition #
This option should be the easiest to pick up since you are working on your own developer edition, not constrained by organizational directives & constraints, and, typically, without overheads.
Once the project is created run SFDX: Create a Default Scratch Org. The option will -
- ask you whether the standard login URL can be used (choose this if you are not sure what you are doing and have no instructions from environment managers/other developers)
- allow you to name the connection. Useful to connect to the same environment at a later time
- open a browser to login
Login with your developer edition credentials, and close the window on successful login. You should now see that the project is connected to your org.
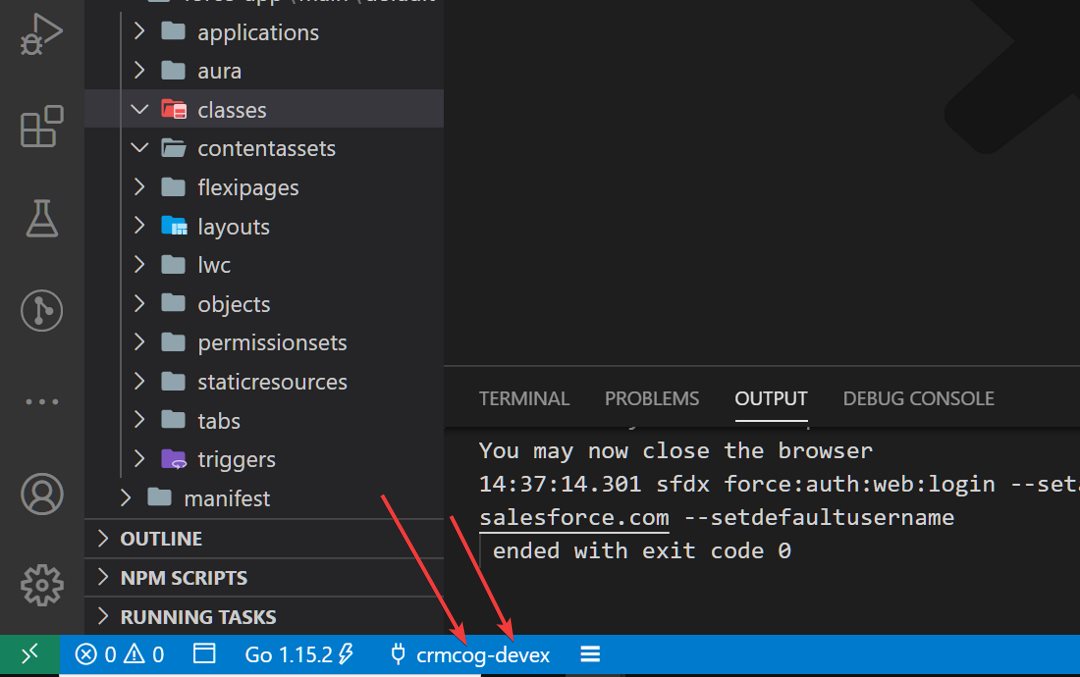
Expand the force-app folder in VSCode file explorer. Right click on manifest > package.xml. Select SFDX: Retrieve Source in Manifest from Org and have some hot tea while the metadata gets downloaded.
A manifest file indicates all the metadata that needs to be downloaded from the org. You can select metadata types (e.g. Apex Classes, Lightning Web Components) and even the specific objects (e.g. AccountClass).
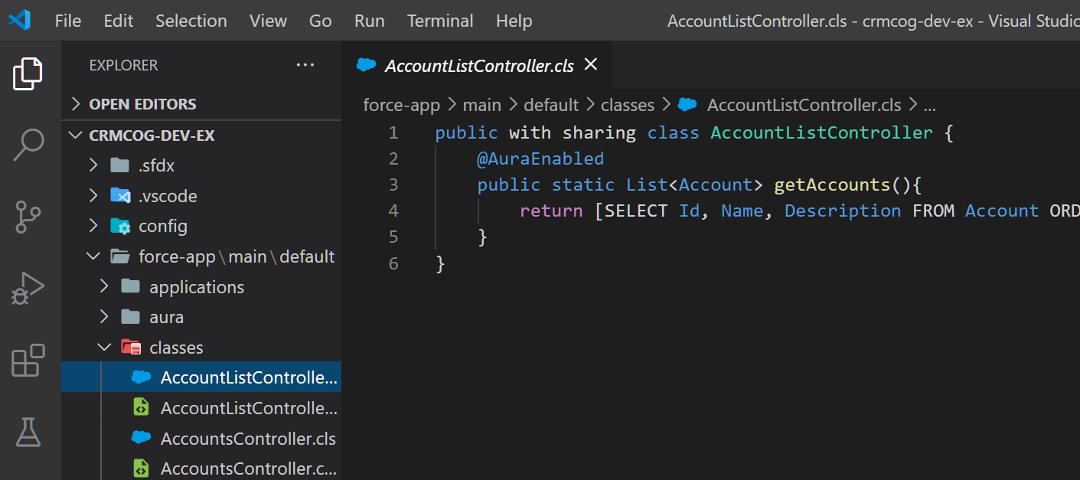
You can make changes to any object, right click on the object in VSCode file exporer, and select SFDX: Deploy Source to Org to push your changed code to your org.
While you are here, check out the below cool things you could do.
Execute Anonymous Apex #
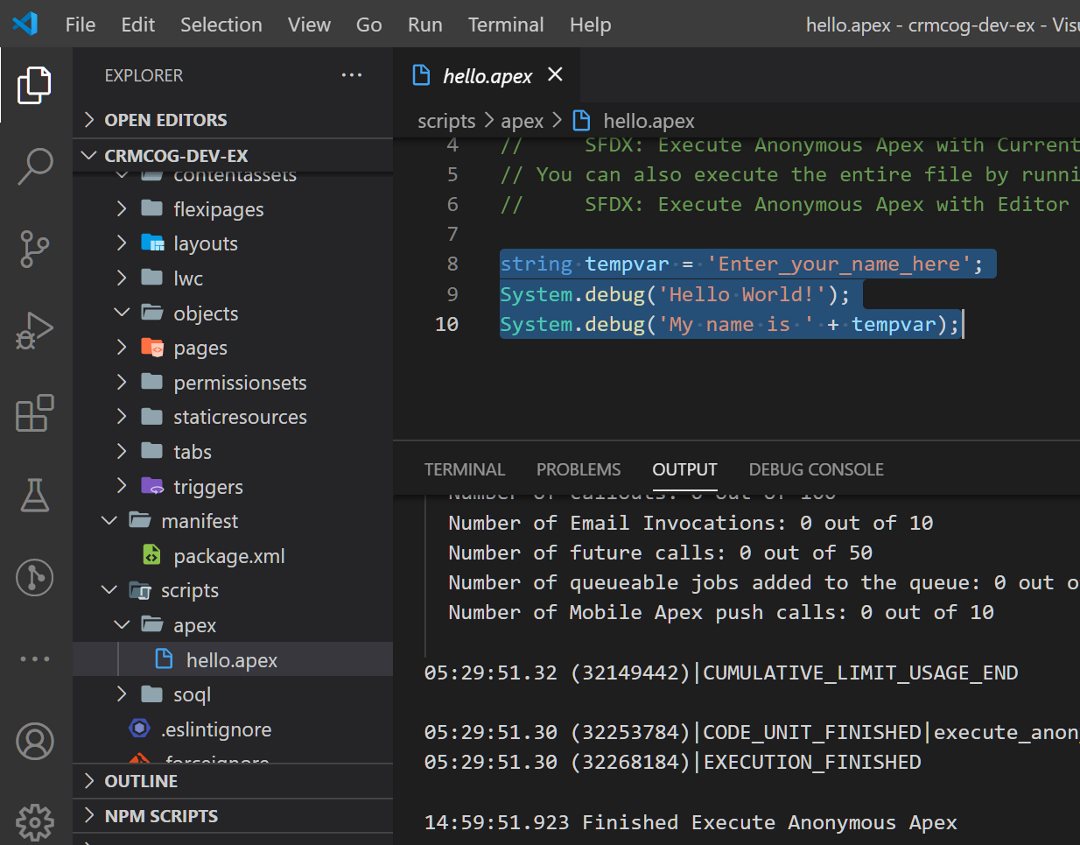
Go to force-app > main > default > scripts > apex. Click on any existing script file to open it and select code.
Hit Ctrl+Shift+p > SFDX: Execute Anonymous Apex with Selected Text to run the script in your org and open the execution log in the VSCode output panel.
Execute SOQL #
Similar to previous section, go to force-app > main > default > scripts > soql. Create a new file or select an existing sample file, and select a specific SOQL query. Next, Ctrl+Shift+p > SFDX: Execute SOQL Query with Selected Text. You will see the results of the SOQL query in the output panel.
Explore LWC #
Hit Ctrl+Shift+p > SFDX: Create Lightning Web Component to create new LWC (e.g. HelloWorld).
Click on force-app > main > default > lwc > Right click on HelloWorld folder and select SFDX : Preview Component Locally. This command will create a local dev environment and open the LWC preview.
Working with VSCode + Dev Hub #
A developer hub for your org can help you manage your development infrastructure on salesforce and allow you to create scratch orgs (which are a convenient way to replicate the parent org quickly and without fuss).
Open the newly created SFDC project. Hit Ctrl+Shift+p > SFDX: Authorize a Dev Hub and authorise developer hub. Next, enter command SFDX: Create a Default Scratch Org to create a scratch org. Answer a couple of questions and your scratch org will be created and authorised for use with the current project.
Working with Version Control Tools #
In the previous section we saw how easy it is to connect to the Salesforce org and get a copy of metadata. Since we have effectively downloaded metadata files and working locally, we may as well version control them.
Using SFDX CLI, you can effectively download all the (supported) metadata from your org, push them to your own Git version control system, and allow developers to work with different versions.
A developer can -
- Use standard Git commands to pull changes
- Create dev branches or work on a specific branch
- Test changes on a scratch org and create pull requests to merge changes in the main org
A designated release manager can merge code, resolve conflicts across branches. You can setup an end-to-end system to pull code from specified branches and push them to target environments (using commercially available tools or using tools like Jenkins).
Deployment Tools #
Once you merge code on Git or push code to dev org, deployment tools can pick up the code and run automated migration to other environments (e.g. integrated dev/test environments). You can either choose to DIY using Jenkins or similar tools, or take help from SFDC-specific deployment tools like AutoRabit, Flosum, Gearset, and friends.
Salesforce packaging (1st or 2nd generation) also help package apps and distribute them - but they are (to the most part) considered by ISVs / product vendors on AppExchange (or elsewhere).
Tooling Support #
Code Static Analysis / Linting & Formatting #
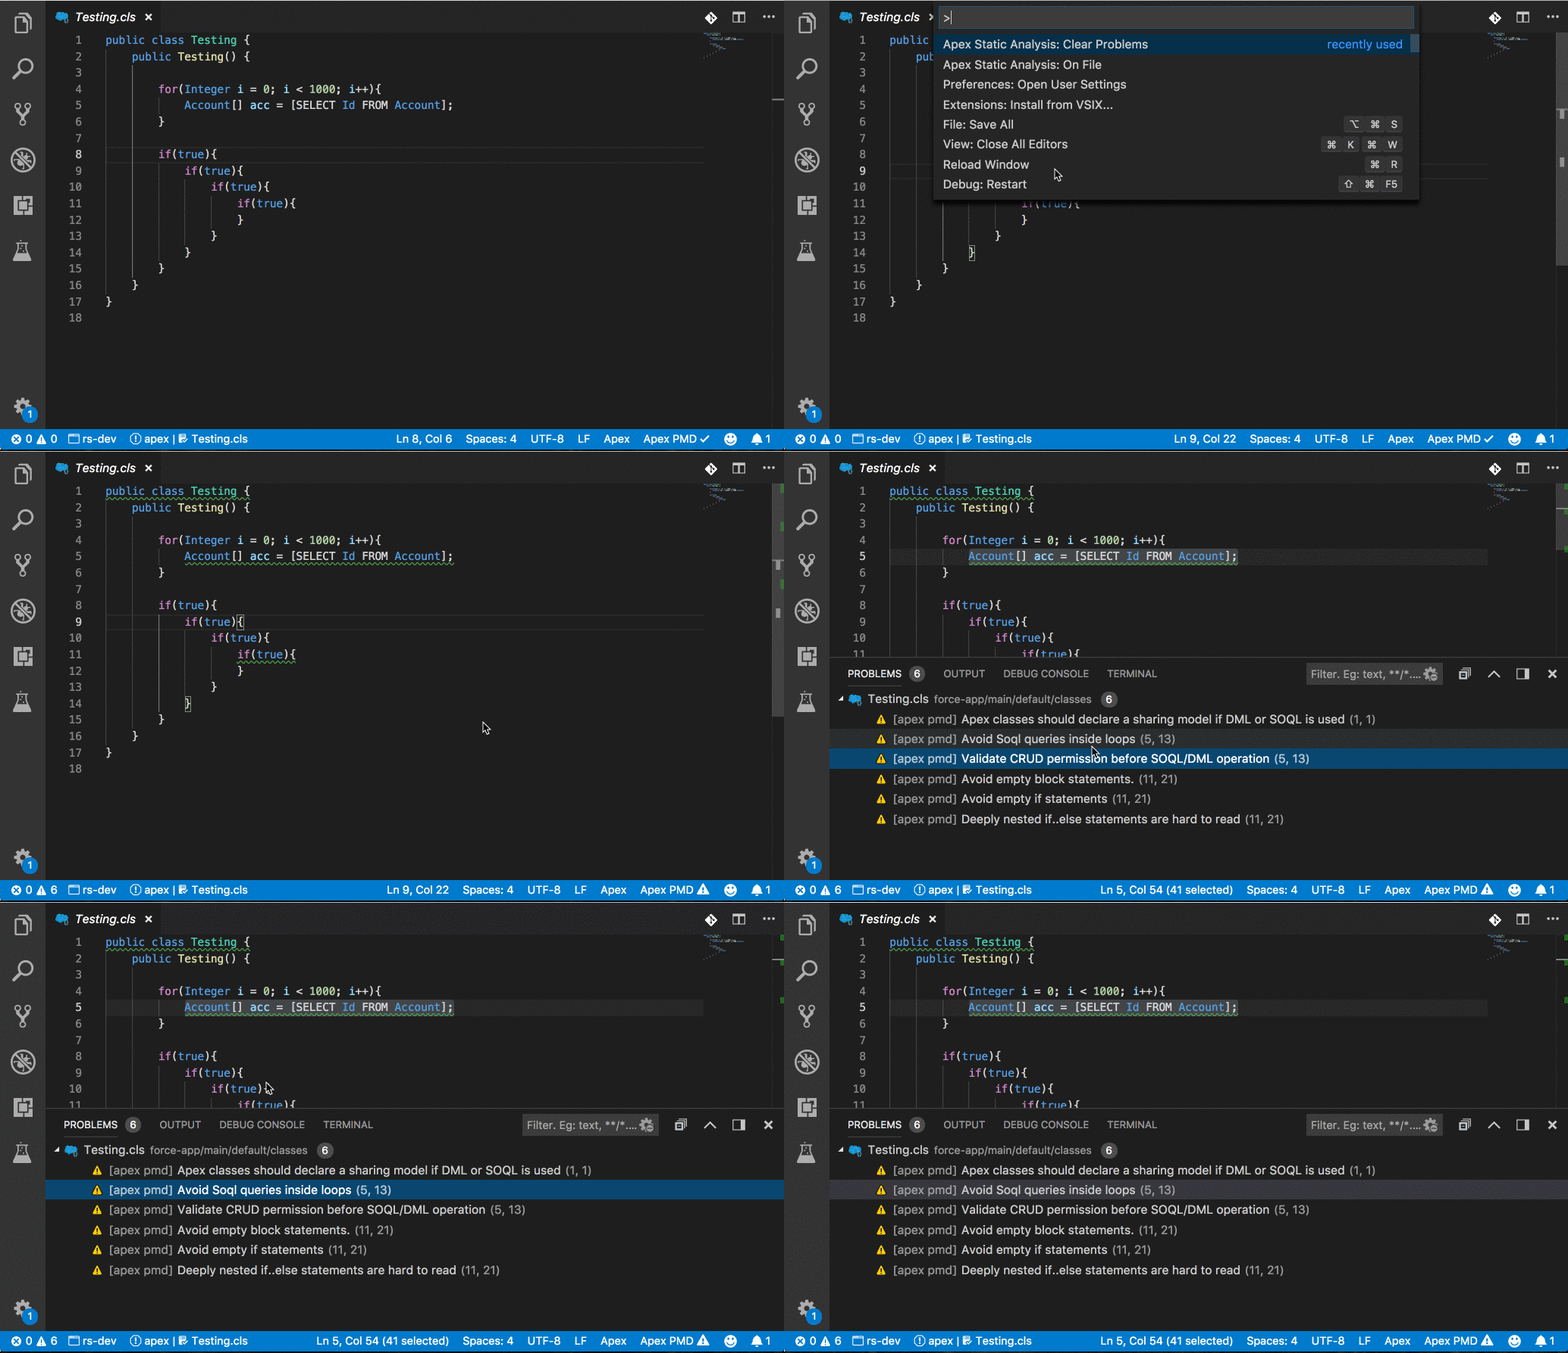
Perform static code analysis using [PMD]. The Apex PMD VSCode extension brings the convenience of having everything in one place.
Do code formatting for your Apex code using Prettier in VSCode.